There Is No Someday |
|
Yanni vs John Tesh, I can't think of many better locations for this clash of icons than the East Ridge of Ingalls North Peak. I'm torn, but push comes to shove, I think my vote is for John Tesh. Though not as common as the pee chasing goats, if you keep your eyes open, maybe you'll have a gander at these creatures in their natural environment. In the wild, John Tesh is a little more shy, his last sighting being on the lesser traveled East Ridge of East Peak while Yanni was seen at Ingalls Pass. A special thanks to both for making this trip to Ingalls so enjoyable. 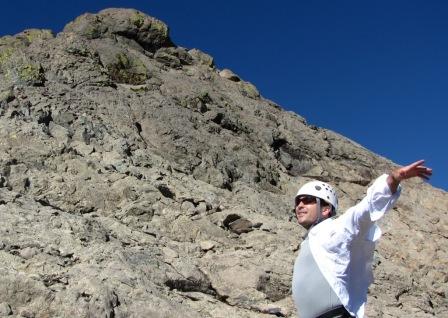
 John Tesh Yanni Drive: 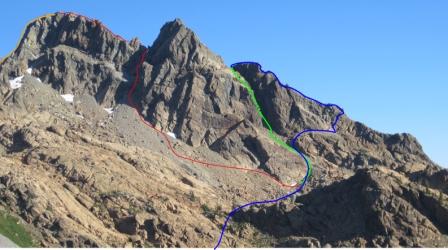 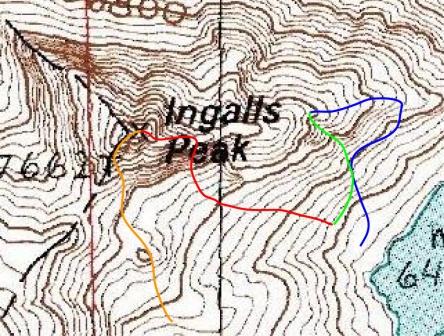 Blue: our partial ascent of E Ridge of E Peak Green: our descent of Dike Chimney Red: our ascent of E Ridge of North Peak Orange: our quick descent of S Ridge of North Peak 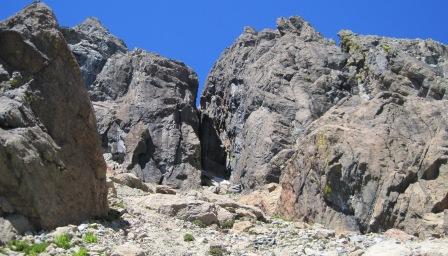 Bottom of Dike Chimney We headed around the west side of the lake, venturing up towards Dike Chimney, an obvious chimney/gully on the east side of East Peak. We headed up to higher ground and then went east of Dike Chimney, choosing a nice class 3/4 route to gain the East Ridge of East Peak, popping over for a short glimpse of John Tesh. 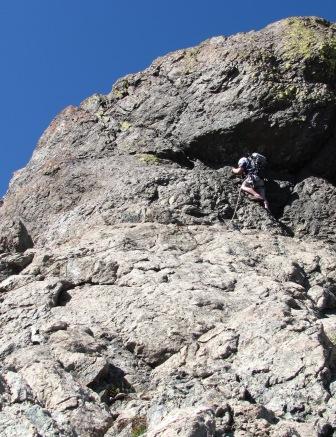
 Short roped section on bottom of E Ridge, E Peak Upper Dike Chimney Near the top of Dike Chimney, the route shown in the dotted green line, we scoped out the remainder of the East Ridge of East Peak, and after a long time of not seeing a clear route that was obviously protectable, we decided to bail on what could be an arduous task of route finding and head to the Select Climb: the East Ridge of North Peak. The view from the top of Dike Chimney is discouraging considering that the skyline of East Ridge, East Peak looks like a mild climb. It is highly possible that our view was from the north side of the ridge line and the route likely heads up the south side of the ridge line. East Peaks north side appears to be considerably steeper than its south side. 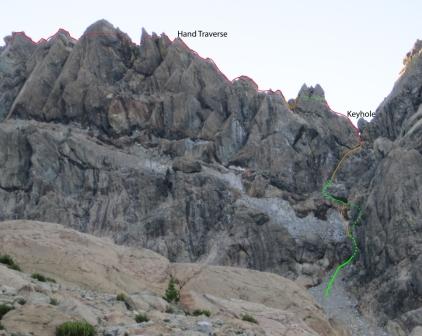 Our ascent of East Ridge of North Peak to the best of my recollection Green: Class 3 and below Orange: Class 4 Red: Class 5 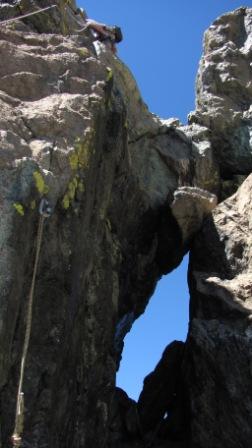
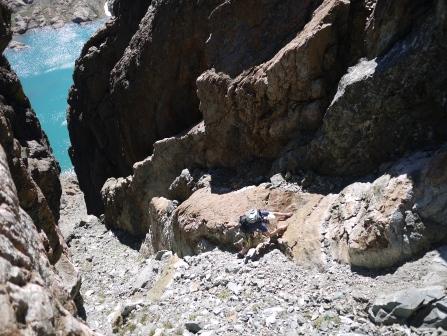
Keyhole with path to ridge line There was a couple above us in the gully, so we headed up a class 4 cutoff to a scree filled ramp, and then switched back up more enjoyable class 3 and 4 scrambling to just below the keyhole. Here we roped up and dawned climbing shoes. A short 40 ft pitch brought us to the ridge proper, where due to previous difficulties simul-climbing with a team of 3 and one 60m rope, we split up the ridge into ~100ft pitches. Our 3 person party and short pitches made this more of a social gathering, making it very enjoyable, even if the 1 rope stretched our time on the climbing route to ~4 hours. 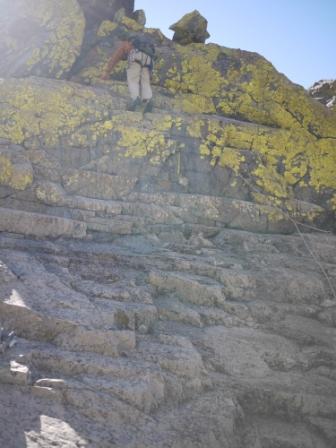
 Bypassing 1st gendarme on right 20ft class 4-5.0 down-climb After passing the immediate gendarme (1st one on ridge) on the right, we down-climbed an airy and easier than it appears class 4-5.0 corner system (orange line on ridge), that does not have significant exposure even though it appears to from the top. The climbing between here and the hand traverse blurred together, in a nice blend of easy, enjoyable, and fairly solid rock that wasn't excessively exposed, but had some exposure broken up by easier, unexposed ground. 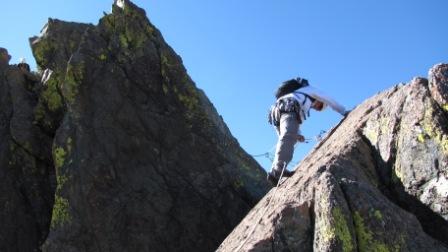 Easy 20 ft hand traverse The hand traverse is not steep, has decent feet, and very good hands. 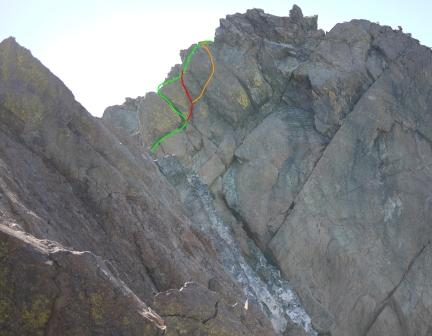 Crux of the climb Green: Summitpost's suggested route Red: our intended route Orange: the branch we took and the road that probably shouldn't be traveled 50ft later, we made a short exposed 10 ft traverse and step over a slightly airy 40 ft drop and bypassed gendarmes and subpeaks on the right to reduce the number of pitches until we were at the base of the crux, a short section of many cracks that lead over the final obstacle before a quick traverse to North Peak proper. Confused about some form of beta implying taking the middle crack, we aimed our sights on the red line, but ended up branching off to the orange line. Apparently a #3 does not suffice for protection in our intended route (a #4 would have worked, a 3.5 might have worked) and it was too awkward with a pack for me to force it. We branched off to the orange line with its nice eery weird sound from a tap, but it did provide some form of protection. I would not suggest this way because after much tapping, it sounded like a 4ft diameter chunk of rock might eventually break free. From my interpretation of our beta, I ignored the left-most crack, but it looks like an easier and less awkward way and it is what summitpost.org suggests. The suggested #3.5 to protect this section might also fit. |

|
| steve@thereisnosomeday.com |